Push Notification & Rich Notification with Firebase Cloud Messaging (FCM) Explained iOS — Swift 5
When I first started implementing this feature, i went through many articles and videos available in the internet. And it was a bit complex at first. The main purpose of this article is to make available all the resources in one place.
This article is going to be a long one.Because I gonna explain each and every step one by one. Hope you will stay with me till the end.
⭐️ If you have already implemented Push Notification using Firebase and You want to learn about Rich Notification , Directly jump to STEP : 11
⭐️ For adding actionable buttons to Notifications, jump to STEP : 15
⭐️ For customizing Notification U.I , jump to STEP : 16
1. Fundamentals :
Apple Push Notification service (Apple Push Notification Service or APNs) is a platform notification service created by Apple Inc. that enables third party application developers to send notification data to applications installed on Apple devices.

Here our Backend is Firebase Cloud Messaging.
Since for implementing Push Notification we need Development Certificates from Apple. That’s why You should have a paid Apple developer account. Because only with a paid developer account you can generate Development & Production certificates.
You also need a real iOS Device to receive Notification, Because you can’t do in Simulator
1. Create and add Team to your App
Let’s start by creating a Single View App or use an existing one. Put the name of your project and click Proceed

Go to xcodeproj in your app. select your app name from TARGETS. Now select Signing & Capabilities. Add Team by signing into your developer account. and copy the bundle ID. (It’s recommended by Apple to have a Bundle ID in reverse domain name format)
2. Adding your app Capabilities

Add Push Notifications & Background Modes as your app’s capabilities. From Background Modes select Remove notifications
3. Create an App ID for your app in Developer Account

Go to apple developer portal. Select Identifiers > add Identifiers

Select App IDs > Continue

Select type App > Continue

Add Description > select Explicit (Bundle ID) > Enter app’s Bundle ID > Continue

select Push Notifications under the Capabilities List. > Save
There’s no need to configure the certificates, because we’ll use configure APNs with API Keys provided by Apple. I will do this in upcoming steps.
Now our app is registered and enabled for Push Notifications.
4. Add Firebase to App
We will do this using Firebase pod files. It is required that you most have Cocoa Pod installed in your Mac. If not do here. If you are new to Cocoa Pod check this
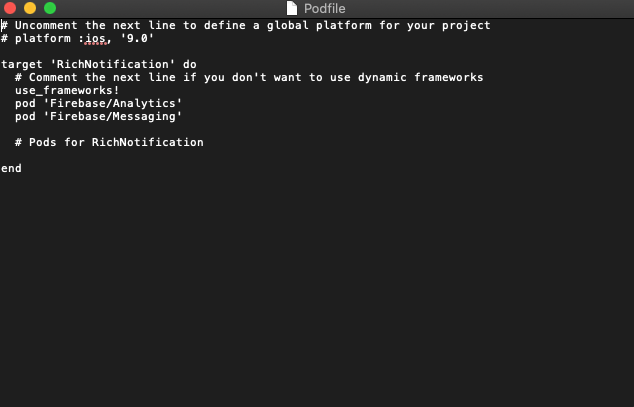
Add pod ‘Firebase/Analytics’ pod ‘Firebase/Messaging’ to your pod file and run pod install command
5. Create Firebase Project & Add Your App to Firebase
Go to your Firebase Console > select Add Project

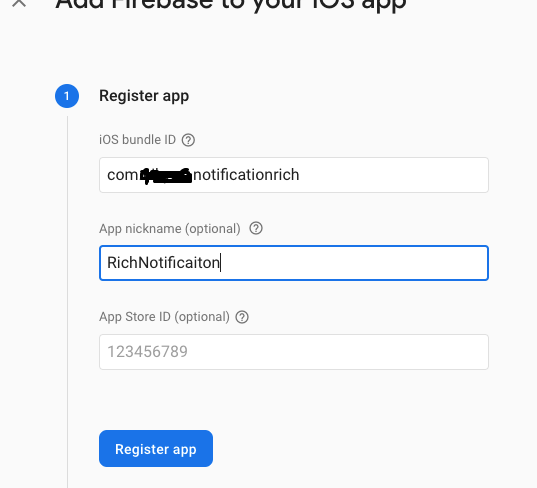
Select iOS

Add App’s Bundle ID > Add Nickname > Register App
Download the GoogleService-Info.Plist > select Next

6. Add GoogleService-Info.Plist to your Project
Before adding the Plist file, make sure that its name is exactly GoogleService-Info.plist.
Add the GoogleService-Info.plist into your project files.
7. Add URL Scheme to your Project
Goto GoogleService-Info.plist > copy REVERSED_CLIENT_ID

Add the copied URL to URL Schemes

8. Generate API Key from Developer Account
Go to Your Apple developer account.
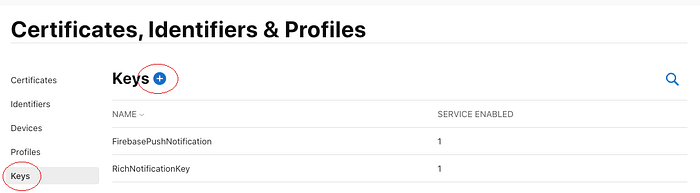
select keys > add keys
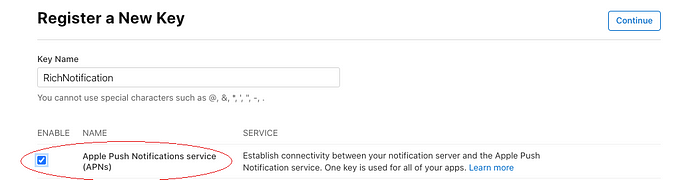
Add Key Name > Enable Apple Push Notification Service (APNs) > Continue
Download the generated file & save it for future reference. You can’t download this second time. Note the Key ID

Note the Team ID by going to your Account details page :

8. Add Generated API Key to Firebase
select settings icon > project settings > upload downloaded key file > add key ID > add Team ID

9. Add Following codes to your AppDelegate.swift
Declare gcmMessageIDKey and add following code to your didFinishLaunchingWithOptions
[Descriptions of the Methods i have used here are available in FireBase Doc]
Add two methods to your AppDelegate.swift
Extend your AppDelegate class with MessagingDelegate
Extend your AppDelegate class with UNUserNotificationCenterDelegate
Here is the complete AppDelegate.swift code
Congratulations .. !!! :D :D Now your app is configured and ready to receive Push Notification …
10. Send Push Notifications to your device
Select Cloud Messaging from left drop down list in firebase console > Select send your first Message > select Cloud Messaging

Add Title > Add Body

Select your Target App which is your app’s Bundle ID > Review > Pushlish

Now the message will be available in your device …. 😺

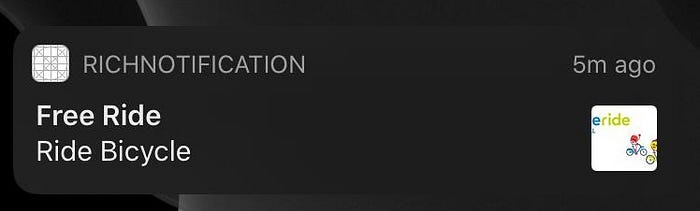
11. Creating a custom Push Notification with an Image (known as Rich Notification)
Creating custom push notifications with an image as a media attachment makes a notification look a lot nicer. In other words, it makes it a richer notification
we will create something like this


To do this, we need to create a new Notification Service Extension which will modify the content of a remote notification before it’s delivered to the user. This can be any kind of notification, like changing the title, as well as downloading an image.
The extension will only be called if the following requirements are met:
- The remote notification is configured to display an alert
- The payload of the remote notification includes the
mutable-contentkey with a value set to 1
Note that you cannot modify silent notifications or those that only play a sound or badge the app’s icon.
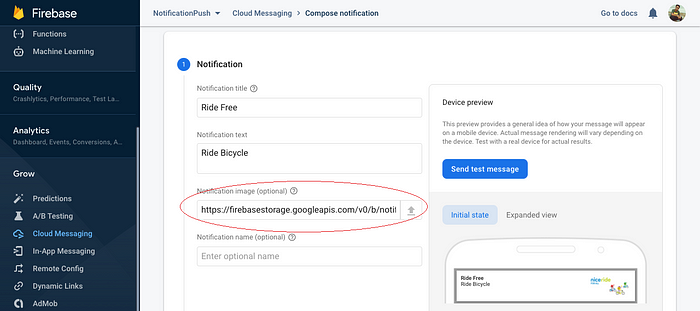
12. Generating Image url to send with Notification
I have used Firebase storage to Store & generate the url of the image
Select Storage > Upload file > click on Image name > Copy the image address.

Add the copied address to the notification image field. If the link is correct the image will be shown in right side corner.
13. Adding a Notification Service Extension
Select ‘+’ button to add Extension

Select Notification Service Extension > Click Next

Add Product Name > Finish > Cancel (In Activate “Service” scheme ? )


This is one of the easiest but Important Part.
Set the Deployment Target of Service to Lower than the current running Device. (In my case I am setting it to iOS 11.0 )

Now, our NotificationService class is Ready !! Let’s see what’s inside
NotificationService class has two methods
The
didReceive(_:withContentHandler:)uses the default notification content as a best attempt
didReceive(_:withContentHandler:) method has only about 30 seconds to modify the payload and call the provided completion handler.
If your code takes longer than that, the system calls the serviceExtensionTimeWillExpire() method, at which point you must return whatever you can to the system immediately.
If you fail to call the completion handler from either method, the system displays the original contents of the notification.
14. get image URL & download the image
The JSON payload that will be received form firebase has the format :

From this json payload we will extract the image url string.Add the following code to didReceive(_:withContentHandler:)
Now, we will download the image from the URL & will store it to Temporary Directory
we will create an attachment of type UNNotificationAttachment which will hold the URL of the image and pass that to completionHandler i.e handler in our case
Let’s call the downloadImageFrom(url:, handler) method from didReceive(_:withContentHandler:)
Here’s the complete NotificationService class code
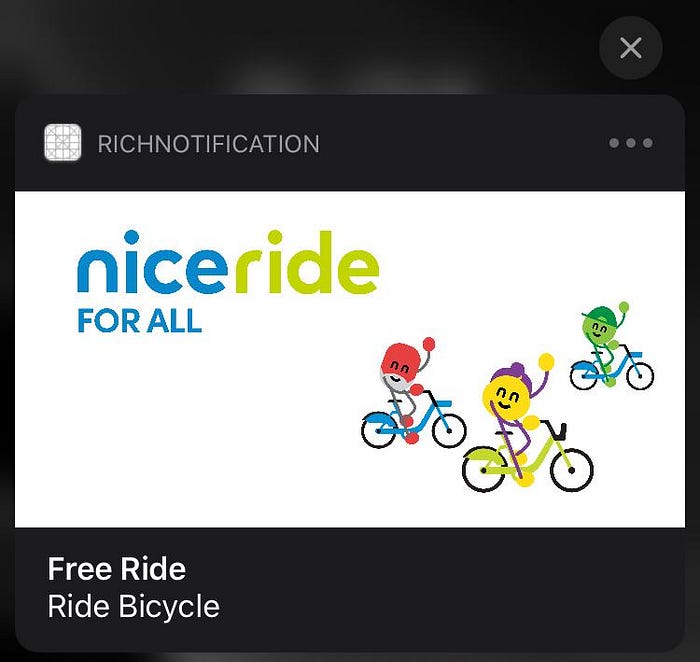
Finally, Go to Firebase > CloudMessaging, push one notification with the same image link as we have discussed earlier.
Awesome 😀 …. Swipe Left > Select View
15. Adding actionable buttons to Rich Notification
The next step is adding interactive or actionable buttons to rich notifications.
For this we need to register a so-called notification category in which we can register the buttons. Every notification within that category will show the registered buttons beneath the content when being displayed in detail.

we have to register notification categories containing the actions at launch time within the main app.
Add this code to your application(application:,didFinishLunchingWithOptions)

will register an “OpenNotification” action button for all notifications in the “myNotificationCategory” category.
It’s important to give your actions a unique identifier as it’s the only way to distinguish one action from another.
i. Adding Category to Rich Notification
This can be done in two ways :
- By adding the category key to the “aps” dictionary of the JSON payload.
- By directly setting the categoryIdentifier of BestAttemptContent with in
didReceive(_:withContentHandler:)method of NotificationService class.
Since we can’t change the JSON payload of firebase, so that we will go with second step.
uncomment line
bestAttemptContent.categoryIdentifier = “myNotificationCategory”
in
didReceive(_:withContentHandler:)
finally … push a new message, now you can see OPEN button is coming under the Notification.
ii. Handling the actionable button press callback
with in the userNotificationCenter(_:didReceive:withCompletionHandler:)method of UNUserNotificationCenterDelegate you can find the selected action and perfrom required operation.
Compare the actionIdentifier of response with your actionable button Identifier.

16. Customizing the Appearance of Notifications
We can customize the appearance of our iOS app’s notification alert with a notification content app extension.


i. Add the Notification Content App Extension
select ‘+’ icon to add extensions
Select Notification Content Extension > Next


Add product Name : In my case ‘Content’ > Finish > Cancel
Now, NotificationViewController is created !!
ii. Configure the info.Plist (available in content group)

- UNNotificationExtensionCategory (already Present)
UNNOtificationExtensionCategory holds the identifiers of all the categories. We have added one category (ID : ‘myNotificationCategory’) to the app. So we will add it to Plist. UNNOtificationExtensionCategory will be of type Array to hold multiple Identifiers
Make UNNOtificationExtensionCategory to Array, make item 0 to type String and add Category ID there(e.g : ‘myNotificationCategory’)
2. UNNotificationExtensionUserInteractionEnabled (to be added)
add key UNNotificationExtensionUserInteractionEnabled of type Bool, set it’s value to YES
PURPOSE : User can interact with the custom U.I
3. UNNotificationExtensionDefaultContentHidden (to be added)
add key UNNotificationExtensionDefaultContentHidden of type Bool, set it’s value to YES
PURPOSE : Default U.I will be hidden
4. UNNotificationExtensionInitialContentSizeRatio ( already present)
Change value of UNNotificationExtensionInitialContentSizeRatio to any value between 0 to 1
PURPOSE : A floating-point number that represents the initial size of your view controller’s view expressed as a ratio of its height to its width.
iii. Customize MainInterface.storyboard
Customize the storyboard and add outlets to the NotificationViewController

Finally you can assign data to your outlets, with in didReceive(notification: ) method within NotificationViewController
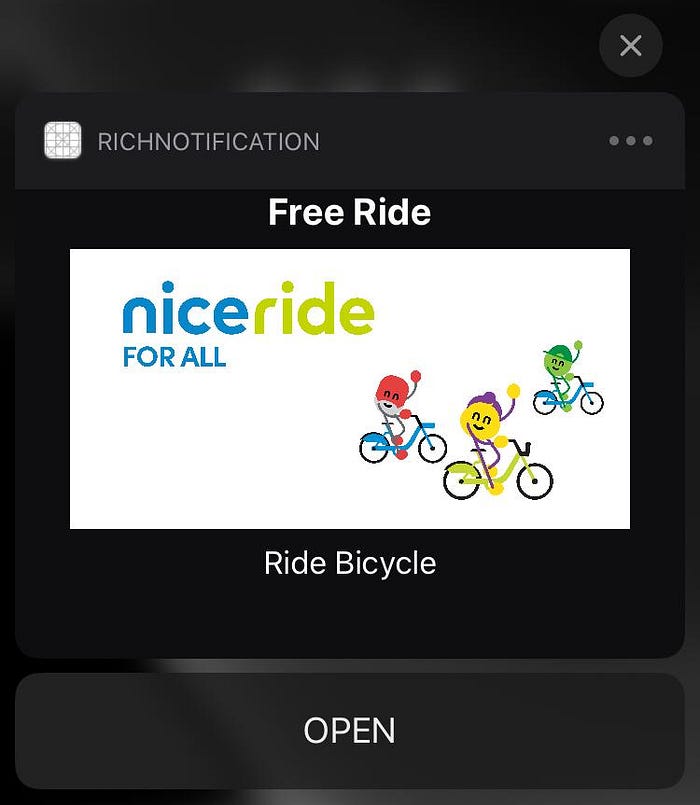
Awesome… just give a last push & check the new customized Notification UI 😀😀
PROJECT LINK :
Conclusion
That’s it — a great way to enrich your app with rich notifications.
Thanks for your Patience 😅 …. Happy Coding !